First things, first. I have amazingly received another award. I never thought anyone would even look at my blog, let alone give me for an award for it and it is very rewarding for me. This Kreativ Blogger award comes from Teresa over at
A blog about food. Her blog is wonderful, she has great recipes, so if you haven't visited her, please do so today. You won't be disappointed.

I am giving you 2 recipes today, just because I feel like it. My kids are quiet, the husbands sleeping, so in between cutting out paper hands for the girls , I am posting my absolute favorite cranberry-walnut chicken salad and sugar cookiebars. First the chicken salad. This recipe comes from
smitten kitchen. I am sure most of you know about her blog. It is amazing. There are so many recipes and they all look so good. Go see, if you haven't already seen. You will be so happy you did. I love this salad because it has so many different textures, creamy and crunchy and just so good. I tweaked it a little to suit me. My changes will be in parenthesis.
Cranberry-Walnut Chicken Salad
4 cups cubed cooked chicken
1 cup walnuts,chopped and toasted
1 cup dried cranberries
1 celery rib,diced into small bits
2 tbsp chopped shallots
2/3 -3/4 cup mayo ( i didn't measure, just put what looked right)
3 tbsp Tarragon vinegar ( used white vinegar, its fine)
2 tbsp finely chopped tarragon or herb of your choice( I used dill)
1/2 tsp salt
1/2 tsp pepper
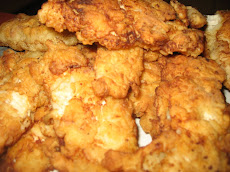
The way I prepared my chicken, was The Barefoot Contessa way. I took 2 chicken breasts on the bone and drizzled them with olive oil and seasoned with salt and pepper.

Roast at 425, for 40-45 minutes, or until they look like this:

I know my picture is upside down. So dumb. Let the chicken rest and when it is cool enough to handle, shred it into large bowl.

Then comes the hard part. Add all ingredients to the bowl with the chicken and mix well.

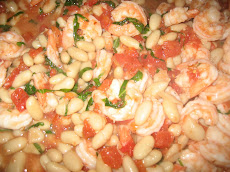
Refrigerate and enjoy on bread, english muffins, put it in wraps or enjoy it on toast. I am going to share one of my favorite appetizer s with you. Have you seen these little shells in the supermarket. When you see them, buy them. They are so versatile. Sweet or savory.

I take a teasoonful of chicken salad and put it in a prepared shell and serve it as an appetizer. People love it.

And why wouldn't you? They are adorable and really tasty. Try it, you'll like it.
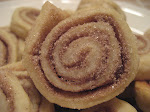
Next up are sugar cookie bars, that's right you heard correctly. Sugar cookies as bar cookies. This recipe comes from
stylish cuisine, this blog is full of goodies you have to see to believe. So when you have a minute , go check it out. I'm sure you will like it. You will find things like this on there:

These sugar cookie bars are so easy and it makes a huge amount. They are perfect for a school bake sale or a big holiday party. The original version called for buttercream frosting, but I used a cream cheese frosting instead, I didn't want them overly sweet. I even cut down on the amount of sugar used. I only used 1 2/2 cups and it is just perfect to me.
Sugar Cookie Bars
1 cup butter, room temperature
2 cups sugar ( i used 1 1/2)
4 eggs
2 tsp vanilla
5 cups flour
1 tsp salt
1/2 tsp baking soda
Cream butter and sugar, until fluffy.
Add eggs, one at a time, mixing after each addition.
Add vanilla and mix well.
In a separate bowl, combine flour,salt and baking soda.
Add dry ingredients to wet ingredients and mix until just combined.

Spread into a greased jelly roll pan (13x18)

Bake at 375 for 10-15 minutes, or until golden and a toothpick comes out mostly clean. Cool completely and frost with your favorite icing. Cut into as many bars as you can. This makes alot!

I used cream cheese icing. I also doubled the icing , you can never have too much. Here is the recipe:
Cream cheese icing
1/2 cup butter ,softened
1 8oz package cream cheese, softened
1 tsp vanilla
3 1/2 cups powdered sugar
Beat together butter and cream cheese, add vanilla and then add powdered sugar. Beat until you reach the consistency you want.

Aren't they lovely? And the best thing about these cookies, think about the holidays. For Valentines day add a little red food coloring to the icing, St Patricks Day, add some green, how about Halloween add some orange food coloring and you will have a huge tray of the most festive cookies, at whatever party you are at.

I hope you try them, you will like them. They are a keeper.


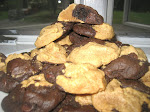


 Chocolate Peanut Butter Cookie Duo


 I think the next time I will double the peanut butter dough, because it didn't make as much as the chocolate cookie dough. It worked out ok though, I just used the leftover chocolate dough to make delish chocolate chocolate chip cookies, that were awesome as well.
 Everything Lo Mein
 Heat remaining oil to a ripple, then add meat and stir fry for 4 minutes. Remove to a plate and keep warm. Add ginger,garlic, and veggies to pan.


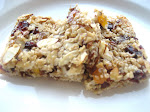
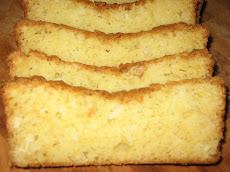
 Orange- Cranberry Walnut Loaf


 We went to my Brother-in- laws house in Virginia for the long weekend and as usual it was a great time. There was BBQ and of course, fireworks:
 A good time was had by all, but by the end of the day, we were all tuckered out. Some of us more than others.
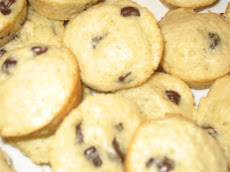
 Now onto the brownie bites, I would say these definately fall somewhere between a brownie and a cookie and any recipe that calls for the use of my trusty, favorite mini muffin pan, I am all over that. This is a back of the package recipe, which I think makes life easier. Here we go:

 They were a huge hit with my husband and my office co-workers. The oohs and ahhs made it all worth while. I love oohs and ahhs, don't you? Great for a party or a housewarming gift. These are a keeper in my book.