


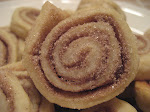


 I am a huge fan of Cinnabon. Oh, come on you all know who they are. If you have ever been to a mall, you have probably walked by one or tried to walk by one, but inevitably you get sucked in by the smell and you give in and buy this humongous creation of butter and dough and cinnamon sugar and then curse yourself the rest of the day for having no willpower at all...I have done it, I am not ashamed to admit it. My sister and I have made cinnamon rolls with yeast and they were good, but they were time consuming and I don't have alot of time to spend waiting for dough to rise. These are more a biscuit type cinnamon roll. so easy and they are so gooey and soft, they are a great fake out to the all time consuming yeast cinnamon roll. The original recipe can be found here, at Ezrapoundcake. All you have to do is check out the recipe index and you will know why I visit there so often.
Quick Cinnamon Biscuits
Filling:
1/4 cup brown sugar
2 tsp cinnamon
1 tsp nutmeg
Mix together in small bowl and set aside.
Biscuit Dough
2 1/2 cups flour
2tbsp packed, brown sugar
2 tsp baking powfer
1/2 tsp salt
1 1/2 cups plus 1 tbso heavy cream
Icing:
6 tbsp powdered sugar
6 tsp heavy cream
Directions:
Preheat oven to 400.
For the Dough:
In a large bowl, stir together the flour,brown sugar,baking powder and salt.

You do not need to use your stand mixer for this recipe, just a bowl and a good wooden spoon.
Add 1 1/2 cups of heavy cream( yes, this is fattening), and stir until dough forms a ball, about 1 minute. With your hands, fold dough over a few times in the bowl, until dough is smooth.

Turn the dough out onto a lightly floured surface. Lightly flour your hands, and pat the dough into a 1/2 inch thick rectangle, about 9x13 inches. Brush the surface of the dough with the remaining tbsp of heavy cream.

Sprinkle evenly with the cinnamon sugar topping.

Starting from the long side, roll dough into a cylinder.

Slice into 9 equal rounds.

Place the rounds, cut side down, into an ungreased 8 inch square baking dish or a pie plate.

Bake about 30 minutes, until biscuits are lightly browned.
For the Icing:

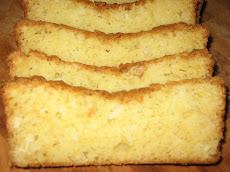
These were so quick and easy and they really were good. A great treat to serve if you are having company stay for the holidays and what a great way for them to wake up, to a house that smells like Cinnabon.

I will eventually try a yeast recipe, but for now these cinnamon biscuits will do the trick.
 Come on, who wouldn't want one of these with a nice cup of tea, coffee or hot chocolate while you are decorating your tree this year? Or have a batch ready Xmas morning and enjoy them while the kids are tearing through their presents. I would, I'll have two, thanks....lol

Turn the dough out onto a lightly floured surface. Lightly flour your hands, and pat the dough into a 1/2 inch thick rectangle, about 9x13 inches. Brush the surface of the dough with the remaining tbsp of heavy cream.

Sprinkle evenly with the cinnamon sugar topping.

Starting from the long side, roll dough into a cylinder.

Slice into 9 equal rounds.

Place the rounds, cut side down, into an ungreased 8 inch square baking dish or a pie plate.

Bake about 30 minutes, until biscuits are lightly browned.
For the Icing:
While the biscuits bake, mix together confectioner sugar with the heavy cream until smooth.
When you remove the biscuite from the oven,immediately drizzle with icing. Serve warm or I am sure they would be fine the next day or later on if you have to microwave them for a few seconds or do what I did and eat them cold.
When you remove the biscuite from the oven,immediately drizzle with icing. Serve warm or I am sure they would be fine the next day or later on if you have to microwave them for a few seconds or do what I did and eat them cold.

These were so quick and easy and they really were good. A great treat to serve if you are having company stay for the holidays and what a great way for them to wake up, to a house that smells like Cinnabon.

I will eventually try a yeast recipe, but for now these cinnamon biscuits will do the trick.
 Come on, who wouldn't want one of these with a nice cup of tea, coffee or hot chocolate while you are decorating your tree this year? Or have a batch ready Xmas morning and enjoy them while the kids are tearing through their presents. I would, I'll have two, thanks....lol
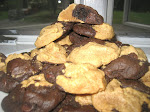
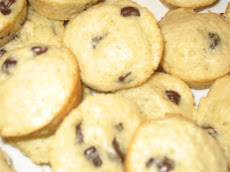
 Week 7 of Christmas Cookies and do I have a treat for you, I have found a new favorite holiday cookie and it comes from


 Ok, we are into Week # 6 of the 12 Cookies of Christmas and this is a new one for me. I found it over at Valerie's blog,
  Add flour and oatmeal, blend until it holds together. Heat milk in saucepan and add chocolate chips.


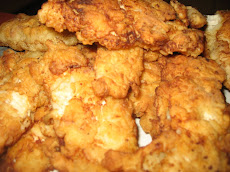
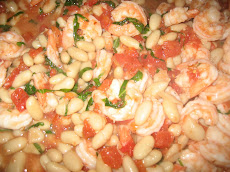
 I love this recipe. It is easy and so, so flavorful. It is good for a brunch or if you cut it into small enough pieces, it would work as an appetizer. It is great for vegetarians and just if you are looking for something lighter to eat. This recipe comes from Amy over at
 I lined nothing, this is a thawed out frozen pie crust. Brush the crust with Dijon mustard.
 Melt butter in large saute pan and add Zucchini and onion.


